How to Prep Your Visor for Spring Riding Season
Zakia AshrafSpring is here. The days are getting longer, the roads are drying out, and that itch to ride is back. But before you pull your helmet off the shelf and hit the A-roads, there's one thing most riders overlook: the state of their visor.
After months of storage, or riding through a grim British winter, your visor has probably picked up scratches, road film, water marks, and maybe a stubborn smear or two you can't explain. None of that matters on a wet November afternoon. It matters a lot when you're riding into low spring sun at 60mph.
This guide walks you through exactly how to prep your visor properly before the season starts, so your first ride is as clear as it should be.
Step 1: Inspect Your Visor Before You Do Anything Else
Before reaching for any cleaning product, hold your visor up to natural light and look across the surface at an angle. You're checking for:
- Deep scratches that catch light and cause glare
- Crazing or micro-cracking (often caused by harsh solvents or cheap wipes)
- Yellowing or hazing that won't clean off
- A worn or lifting anti-scratch coating
If you spot any of the above, no amount of cleaning will fix it, you're looking at a replacement. A scratched or degraded visor is a safety issue, not just an aesthetic one. Ride long enough into low sun and you'll understand why.
If the visor looks structurally sound, carry on to step two.
Step 2: Clean the Outside Properly
This is where most riders go wrong. A dry cloth on a dirty visor is one of the most reliable ways to scratch polycarbonate. Road film, dead insects and fine grit all act like sandpaper the moment you start rubbing.
What you need:
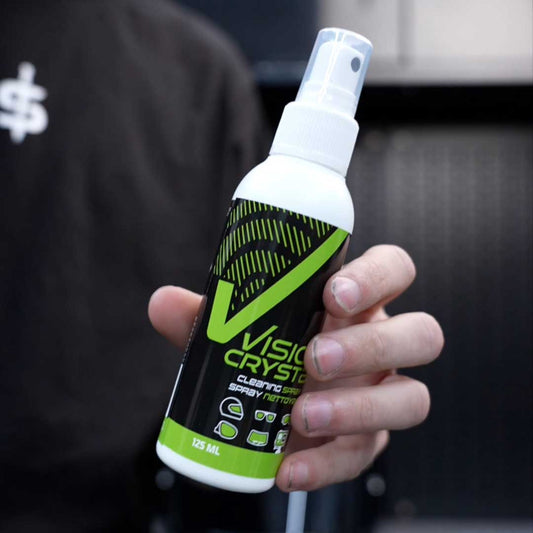
- A dedicated optical surface cleaner (like VisioCrystal)
- A clean microfibre cloth
- Patience
How to do it:
- Rinse the visor first if possible, run it under cool water to float away loose grit.
- Spray VisioCrystal directly onto the surface. The formula cuts through grease, dead insects and road film without harming coatings.
- Wipe gently with a microfibre cloth using light, circular motions. Don't press hard.
- Buff off with a dry, clean section of the cloth.
Avoid household glass cleaners, washing up liquid, or anything containing alcohol or ammonia. These can strip anti-scratch coatings over time and cause the crazing mentioned above.
Step 3: Clean the Inside Too
The inside of your visor fogs up because of moisture, from your breath and body heat condensing on the cold surface. If there's residue, oils, or old anti-fog product on the inner surface, it'll fog faster and more unevenly.
Clean the inside with the same process as above, gently, with a clean cloth and a safe surface cleaner. Be especially careful around any Pinlock inserts or inner lining if your visor has one.
Once clean and dry, the inside is ready for anti-fog treatment.
Step 4: Apply Anti-Fog Treatment
Spring riding means cold mornings, sudden stops in traffic, and temperature swings throughout the day. All of that creates fog. Cleaning alone won't prevent it.
The VisioFog Anti-Fog Microfibre Wipe applies a long-lasting anti-fog coating to the inside of your visor in seconds. Unlike sprays that can run or streak, the wipe format gives you even coverage with no mess.
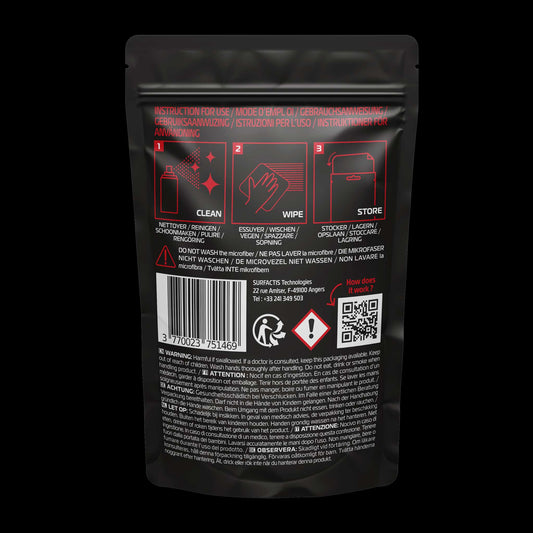
How to apply:
5. Make sure the inner surface is clean and dry.
6. Open the VisioFog wipe and fold it into quarters.
7. Wipe across the inside surface in overlapping strokes.
8. Let it dry for 60 seconds before riding.
One wipe lasts multiple rides. Keep the unused portion sealed in its packet and reuse it throughout the week.
Step 5: Apply Anti-Rain Treatment to the Outside
UK spring weather is unpredictable. You'll get clear mornings, April showers, and the occasional surprise downpour, sometimes all in the same afternoon. Anti-rain treatment means rain beads off your visor rather than sheeting across it, keeping your vision clear without having to wipe.
VisioDry's superhydrophobic formula creates an invisible barrier on the outer surface that repels water instantly. Here's how to apply it for the best results:
9. Make sure the outside of your visor is clean and completely dry first (steps 1 and 2 above).
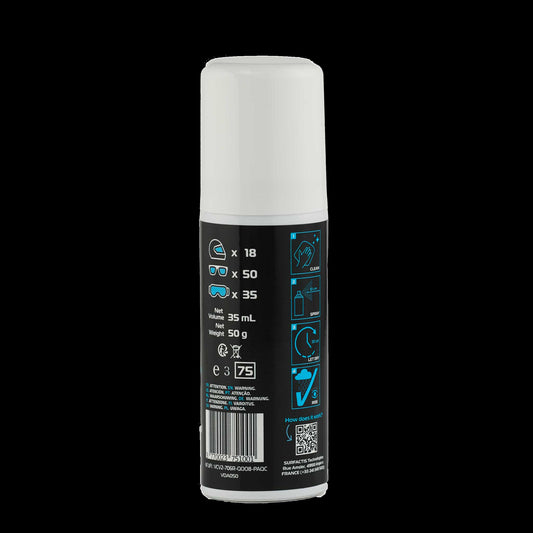
10. Hold the VisioDry aerosol 15–20cm from the surface.
11. Apply a light, even coat across the entire outer surface.
12. Wait 30 seconds for the formula to bond.
13. Buff off any excess with a clean, dry microfibre cloth.
That's it. Your visor is now protected against rain for multiple rides, no smearing, no squinting, no wiping on the move.
Pro tip:
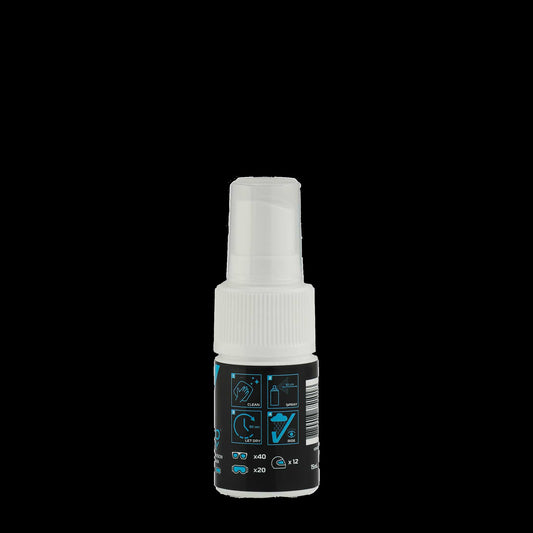
If you're planning a long spring ride or heading somewhere with unpredictable weather, carry the VisioDry 15ml pocket spray with you. It fits in a jacket pocket and gives you a quick top-up treatment on the road.
Step 6: Check Your Vents and Seals
While you've got the helmet out, it's worth a quick check on the vents and chin seal. Blocked vents reduce airflow over the visor and increase fogging. A cracked or compressed chin seal lets cold air in at speed and makes fogging worse.
Give the vents a clean with a soft brush or compressed air. Check the chin seal for any splits or flat spots, most manufacturers sell replacements for under a tenner.
Small things, but they make a difference on a cold spring morning.
How Often Should You Reapply?
That depends on how much you ride and what conditions you're riding in. As a rough guide:
- VisioDry anti-rain treatment: reapply every 2–4 weeks of regular riding, or after any heavy rain session
- VisioFog anti-fog treatment: reapply when you notice fogging returning, typically every 5–10 rides
- VisioCrystal cleaning: clean before every application of VisioDry or VisioFog, and as needed when road film builds up
Riding more than a few times a week? The VisioDry 75ml aerosol gives you far more applications per can and works out significantly cheaper per use than the 35ml version.
Seasonal Visor Prep Checklist
- Run through this before your first spring ride:
- Inspect visor for scratches, crazing or hazing
- Clean outside with VisioCrystal surface cleaner
- Clean inside gently with fresh microfibre
- Apply VisioFog anti-fog treatment to inside
- Apply VisioDry anti-rain treatment to outside
- Check helmet vents are clear
- Check chin seal condition
- Pack VisioDry 15ml pocket spray for on-the-road top-ups
Ready for Whatever Spring Throws at You
Thirty minutes of prep before your first ride of the season means clearer vision, safer riding, and less frustration when the weather turns. Your visor works hard, it deserves a proper start to the season.
Pick up everything you need in one go with the VisioDry Essentials Kit, which includes VisioCrystal surface cleaner, VisioDry anti-rain spray and a VisioFog anti-fog wipe, everything covered in this guide, in one box.