How to Clean a Motorcycle Helmet Visor Without Scratching It
Zakia AshrafA scratched visor is one of the most frustrating things a rider can deal with. It causes glare from oncoming headlights at night, reduces clarity in wet conditions and makes low-sun riding genuinely dangerous. What makes it worse is that the majority of visor scratches aren't caused by debris on the road, they're caused by cleaning the visor incorrectly.
Wiping a dusty visor with a jacket sleeve, cleaning it with a petrol station paper towel, or spraying it with a household glass cleaner are all things that seem harmless in the moment but add up to a visibly degraded visor within a season. This guide covers the right way to clean a motorcycle helmet visor, what to avoid, and how to keep it performing properly for the long term.
Why Motorcycle Visors Scratch So Easily
Motorcycle helmet visors are made from optical-grade polycarbonate, a material chosen specifically because it is impact-resistant, lightweight and optically clear. The trade-off is that polycarbonate is chemically softer than glass and more vulnerable to surface abrasion.
On top of the polycarbonate base, most modern visors have one or more applied coatings: a hard anti-scratch coat on the outer surface, an anti-fog coating on the inner surface, sometimes a UV layer, and on premium visors a Pinlock-ready inner lens system. These coatings are thin and delicate. They can be degraded by the wrong cleaning chemicals, stripped by abrasive materials, and damaged by wiping when the surface is still contaminated with grit or dried bug residue.
Understanding this is the key to cleaning correctly. Polycarbonate scratches when hard particles, grit, road dust, dried bug debris, are dragged across the surface under pressure. If you wipe before you rinse, you're almost certainly dragging something abrasive across the lens. That's true regardless of how soft the cloth is.
What Never to Use on a Motorcycle Visor
Before covering what to do, it's worth being explicit about what not to do, because the most common visor-cleaning mistakes involve products that seem perfectly reasonable.
Household glass cleaners (Windex, any ammonia-based cleaner) These are formulated for glass, not polycarbonate. Ammonia degrades polycarbonate over time, causes hazing and strips anti-fog and anti-scratch coatings. Even a single use can begin this process, and repeated use compounds the damage until the visor is irreversibly hazy.
Alcohol-based products Hand sanitiser, isopropyl alcohol wipes, antibacterial sprays, all of these contain alcohol that strips protective coatings from polycarbonate surfaces. They may clean the visor in the short term but gradually destroy the coatings that make it worth keeping.
Paper towels and tissues These seem soft but contain wood fibres that are abrasive enough to scratch polycarbonate. Using a paper towel on a visor, especially a dry or dusty one, will leave fine scratches that are particularly visible when light hits the surface at an angle.
Your jacket, glove or jersey sleeve A reflex wipe with a gloved hand or jacket sleeve while riding or at the roadside is one of the fastest ways to add scratches. The fabric surface traps grit and road dust and grinds it across the lens. Even a clean sleeve can carry enough fine particles to cause damage.
Dry wiping of any kind Wiping a visor that hasn't been rinsed first, regardless of what you wipe it with, risks dragging abrasive particles across the surface. Always rinse before any cloth contact with the lens.
Acetone, WD-40 or general-purpose solvents These will damage polycarbonate and strip coatings rapidly. Not worth trying under any circumstances.
What You Need
Cleaning a motorcycle helmet visor correctly requires very little:
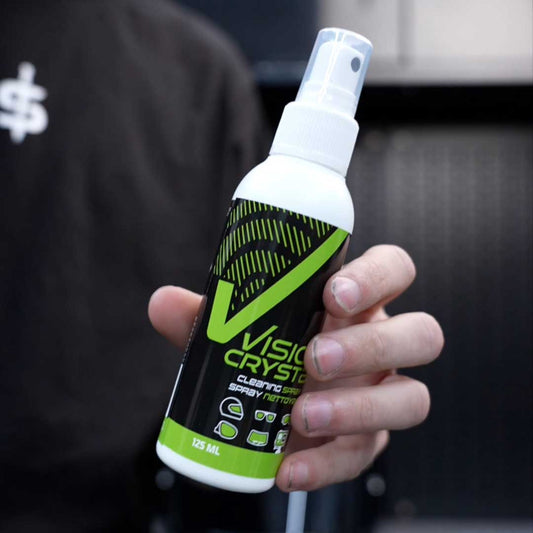
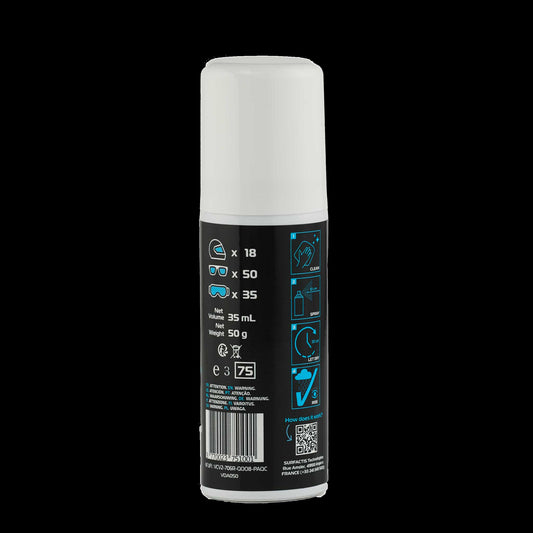
- A dedicated optical surface cleaner: formulated specifically for polycarbonate and plastic lens surfaces, free from alcohol, ammonia and abrasives. VisioCrystal Surface Cleaner is designed exactly for this.
- Two clean, soft microfibre cloths: one for cleaning, one for drying. Use cloths that have only ever been used for lenses. Any cloth that has been used for other surfaces may carry contamination.
- Access to cool or lukewarm running water: or a clean bottle of water if you're roadside
That's the complete kit. No specialist equipment, no expensive products beyond a dedicated cleaner.
The Correct Cleaning Method: Step by Step
Step 1: Remove the Visor If Possible
Most modern helmet visors detach easily with a simple button or lever release mechanism. If yours does, remove it before cleaning. Working on a detached visor is safer, you have full access to the edges and can handle it properly without the helmet getting in the way. It also means you can soak it more easily if needed.
If your visor doesn't detach easily, clean it in place, just be careful not to let water or cleaner run into the helmet interior.
Step 2: Rinse First, Always
This is the single most important step. Before any cloth touches the visor, rinse the outer surface with cool or lukewarm running water, never hot, as hot water can warp the polycarbonate and damage the adhesives holding coatings in place.
Hold the visor under the tap for 15–30 seconds, or pour water over both sides if you're working away from a sink. The goal is to wash away loose dust, grit and road debris so that none of it gets dragged across the surface when you start wiping. Skipping this step is the primary cause of new scratches on an otherwise clean visor.
For stubborn bug splatter and road grime baked on by the sun, the rinse alone won't remove it. Move to Step 3.
Step 3: Soak Stubborn Bug Splatter and Dried Grime
Dried bug residue is acidic and bonds strongly to polycarbonate surfaces, particularly after exposure to heat. Attempting to wipe it off without softening it first is a guaranteed way to scratch the lens.
The solution is simple: soak it. Dampen a clean microfibre cloth in cool water and lay it flat over the affected area. Leave it for 60–90 seconds. The moisture softens the dried residue and allows it to be lifted away cleanly without any scrubbing pressure. For particularly stubborn patches, repeat the soak before trying to wipe.
If you're dealing with bug splatter regularly, cleaning the visor at the end of each ride, before residue has time to dry and harden, makes a significant difference. Fresh bug splatter rinses away easily. Baked-on residue is always a risk to the lens surface.
Step 4: Apply Surface Cleaner and Wipe Gently
Once the visor has been rinsed and any stubborn residue has been soaked and softened, apply VisioCrystal Surface Cleaner. Spray a small amount onto a clean, damp microfibre cloth, not directly onto the visor, which can cause the cleaner to run into the hinge mechanism or onto internal components.
Wipe the outer surface gently in circular motions, using light pressure. You are lifting residue, not scrubbing it off. If something isn't moving, soak it again rather than pressing harder. Work across the entire outer surface including the edges, where road film and exhaust deposits tend to accumulate.
For the inner surface, the approach is more cautious. The inner anti-fog coating is delicate. If the inner surface genuinely needs cleaning, not just a light buff, apply VisioCrystal to the cloth and wipe very gently, using even lighter pressure than on the outside. Never use any pressure on the inner surface while it is wet.
Step 5: Rinse Again
After wiping, rinse the outer surface again with clean water to remove any remaining cleaner residue. Cleaner left on the surface can dry to a faint film that reduces clarity.
Step 6: Dry Correctly
Pat the visor dry using a second clean, dry microfibre cloth. Do not rub, patting removes water without any lateral movement that could cause abrasion. Work across the full surface until completely dry.
Allow the visor to air dry for a minute or two before treating or reinstalling. Any remaining moisture should evaporate naturally.
Step 7: Apply Treatments While the Surface Is Clean
A freshly cleaned visor is the ideal time to apply protective treatments, because the surface is completely free of residue and any treatment applied will bond properly.
- Apply VisioDry Anti-Rain Spray to the outer surface: spray from 10cm, wait 30 seconds, do not wipe. This creates a superhydrophobic coating that causes rain and road spray to bead and roll away instantly.
- Apply VisioFog Anti-Fog Wipe to the inner surface: press the wipe firmly against the inner lens and wipe across it. This prevents condensation from forming on the inside of the visor, keeping it clear at junctions, on climbs and in cold conditions.
Both treatments perform significantly better on a clean surface. The prep step isn't optional, it's what makes them last.
How Often Should You Clean Your Visor?
The answer depends on how and where you ride, but as a general guide:
- After every ride in heavy bug season (late spring through summer): fresh bug splatter rinses away easily; leaving it overnight makes it far harder to remove
- After every ride in wet or dirty conditions: road spray deposits a film of oil, grit and exhaust residue that builds up quickly
- Once a week as a minimum for regular commuters, even dry rides accumulate fingerprint oils, dust and light road film
- Before any long ride or trip: starting with a clean visor and fresh treatments ensures you get the best possible performance from the outset
A quick rinse and wipe at the end of a ride takes under two minutes. The full cleaning routine, rinse, soak, clean, dry, treat, takes around ten minutes and should be done at least weekly.
What to Do About Existing Scratches
If your visor already has scratches, it depends on their depth and severity.
Fine surface scratches: very light scratches that you can feel but that don't significantly affect vision, can sometimes be reduced with a specialist optical lens polish. These fill in the scratch with a fine compound and can improve clarity. Results vary by depth of scratch and whether the anti-scratch coating is still intact.
Deeper scratches that affect vision: any scratch that creates visible glare, distorts vision or catches light at normal riding angles should be taken seriously. A compromised visor is a safety issue, not just an aesthetic one. Polycarbonate visors are designed to take impacts intact, a deeply scratched or structurally weakened visor may not perform as intended in a crash. Replacement is the right answer.
Most helmet manufacturers sell replacement visors as a separate accessory, often at a fraction of the price of a new helmet. If your visor is beyond cleaning, check whether a replacement lens is available for your model.
Summary: The Rules for Scratch-Free Visor Cleaning
- Always rinse before touching the visor with a cloth
- Soak dried bug residue before attempting to wipe it
- Use a dedicated optical surface cleaner, not household glass cleaner, alcohol or solvents
- Use clean, soft microfibre cloths only, never paper towels, tissues or fabric clothing
- Wipe gently with light pressure, let the cleaner do the work, not the force
- Pat dry rather than rubbing
- Be more careful still with the inner surface, the anti-fog coating is the most delicate part of the visor
- Clean regularly so residue never gets the chance to bake on
A visor cleaned properly lasts significantly longer, stays optically clearer and holds treatments better. The products and effort required are minimal, it's the habits and the method that make the difference.
VisioCrystal Surface Cleaner is formulated specifically for polycarbonate and optical surfaces, alcohol-free and residue-free, available here. Once clean, protect the outer surface with VisioDry Anti-Rain Spray and the inner surface with VisioFog Anti-Fog Wipe. All three are available together in the VisioDry Essentials Kit.